- Click on the room, you want to add a symbol
- Click the button “Define and select pattern”
- Go to the tab “Symbols” and click on the button “Assign selected symbol to a room”
- Choose the position for the symbol and which symbol you want to add
- Click on the room on the drawing and the symbol will now be attached to the room
Detailed guide
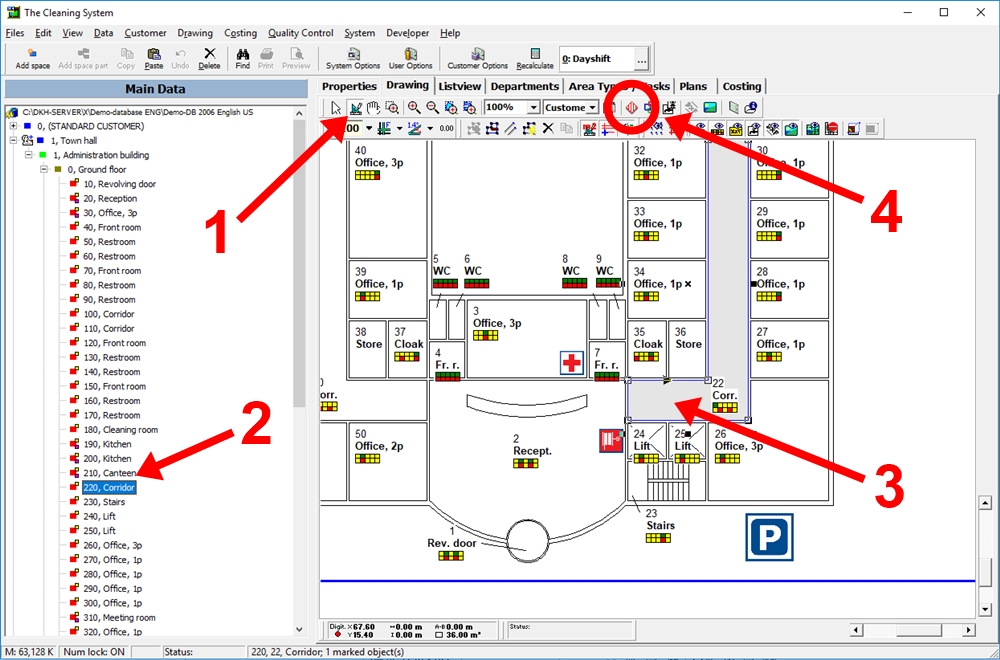
If you want to assign a symbol to a room on a drawing, for instance to show that a corridor has to be cleaned with a machine, you can do it this way:
Go to the “Drawing” tab and make sure that you are in “Drawing mode”. (1)
Choose the room you want to add a symbol. (3) When you click on the room, it will be marked with blue in the “Main data” tree on the left side of the screen. (2)
Click the button “Define and select pattern” in the tool bar. (4)
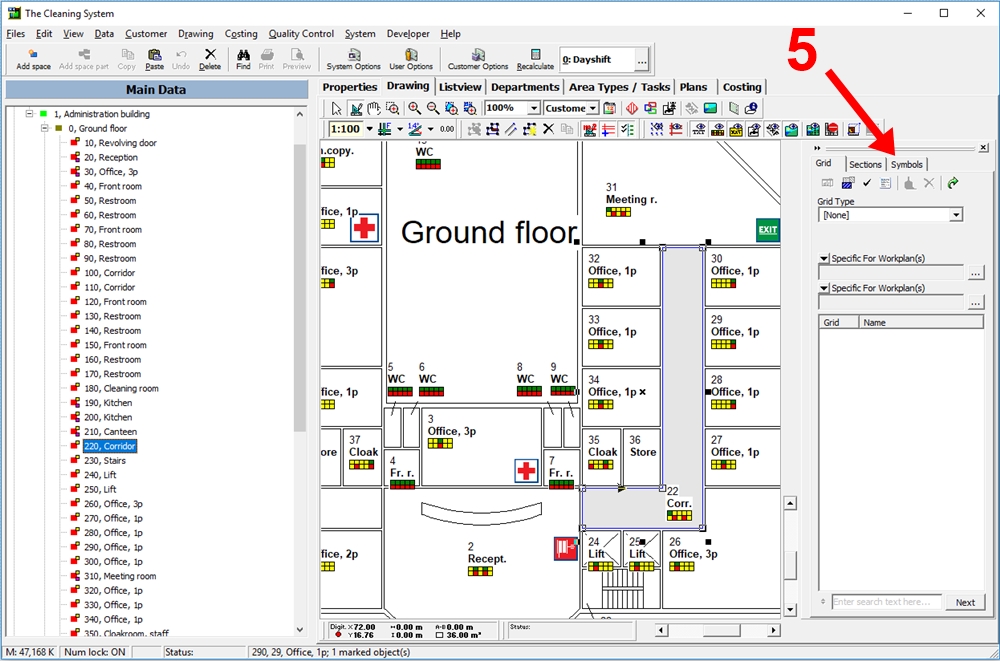
Now a window will appear on the right side of the screen. Click on the tab “Symbols”. (5)
Click on the button “Assign selected symbol to a room”. (6)
Now, click on the symbol, you want to add to the drawing. You can choose between many different symbols which are devided into different categories. (7)
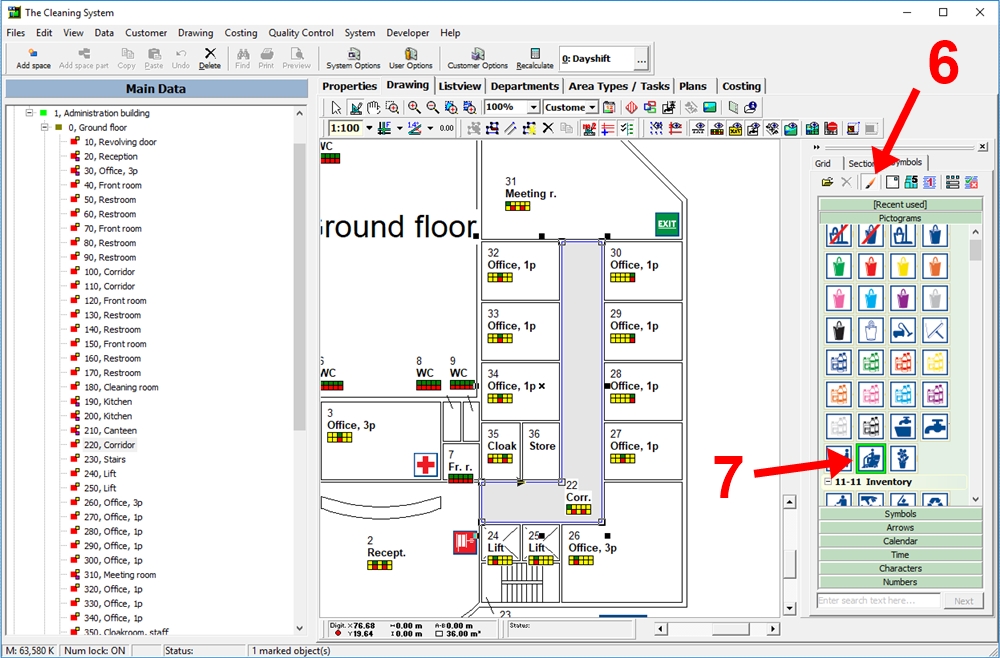
Click on the button “Positioning the symbolers on assigning them to rooms” (8) to choose where, on the drawing, the symbol is going to appear.
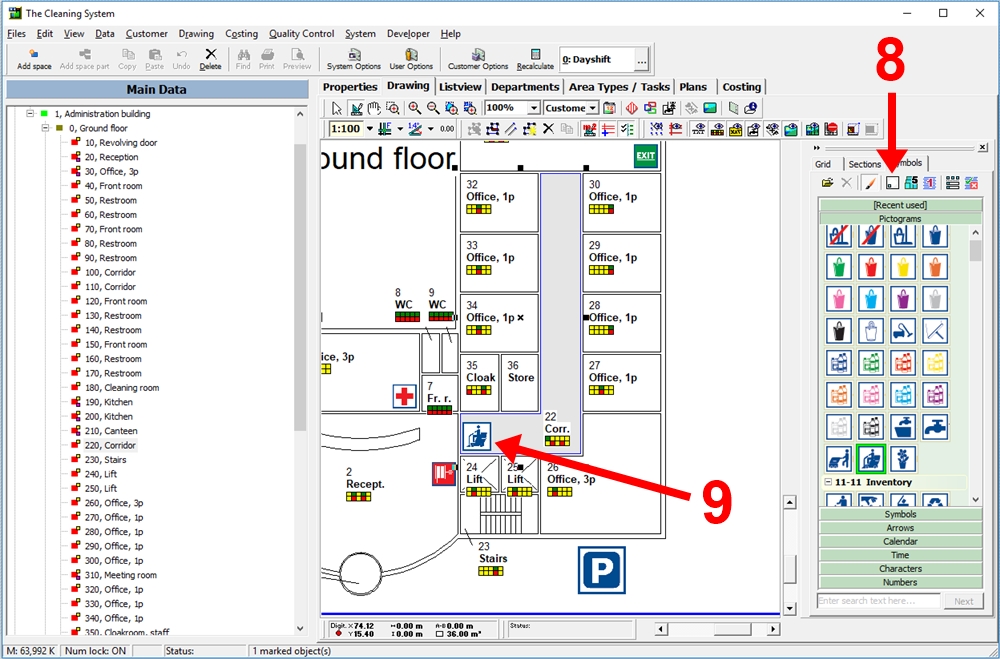
The cursor now looks like a paintbrush (as seen on the button “Assign selected symbol to a room”).
Click on the room to attach the symbol to the room. (9)
For more information about symbols,
watch the video about color coding and symbols in the online tutorials → here