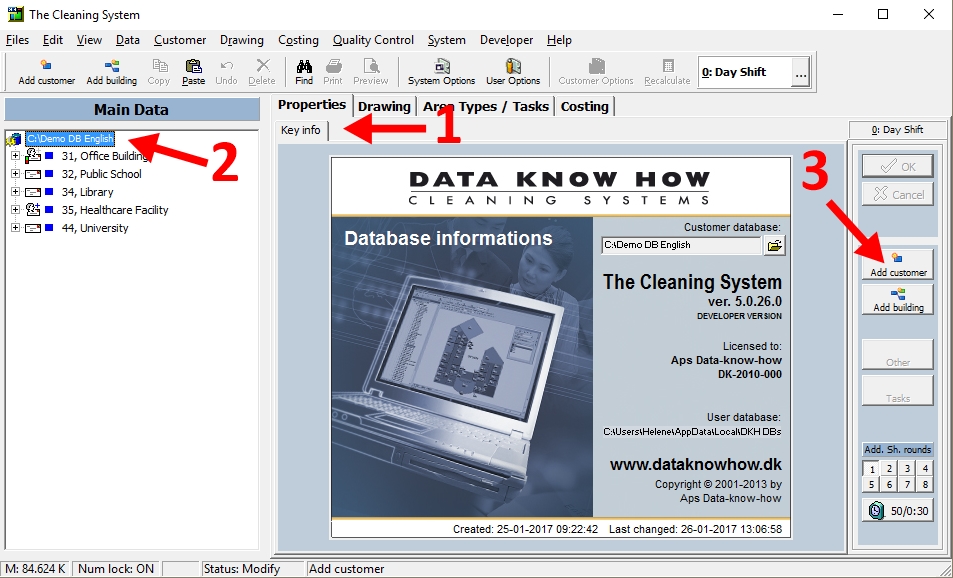
- Select the “Properties” tab and the “Key info” tab.
- Mark the database name or an existing customer.
- Click “Add Customer”.
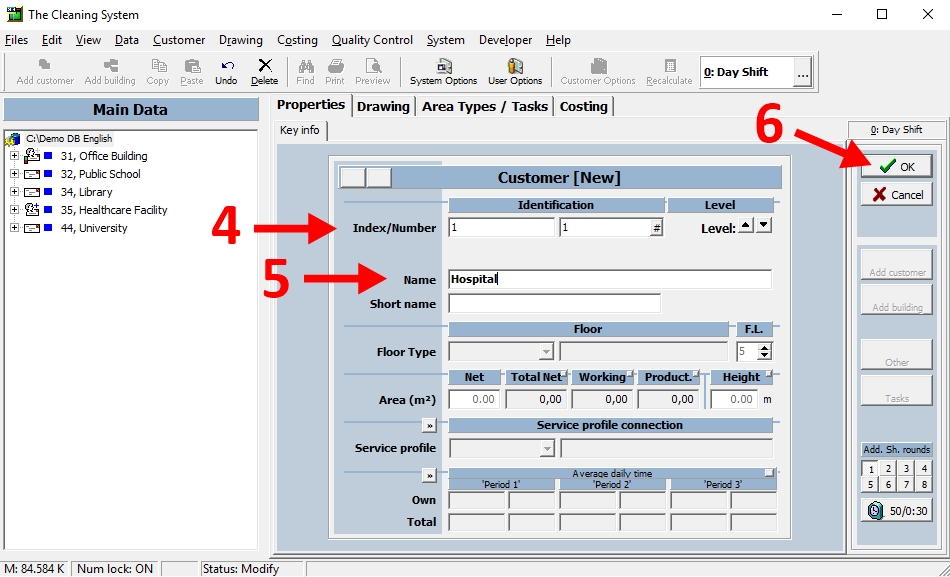
- Enter new customer number in the identification field “Index”.
- Enter the customer name in the “Name” field.
- Click “OK”.
Detailed guide
Select the “Properties” tab and the “Key info” tab. (1)
Mark the database name (top item of the “Main Data” tree) or an existing customer. (2)
Click “Add Customer”. (3)

Enter new customer number in the identification field “Index”. (4)
Enter the customer name in the “Name” field. (5)
Click “OK”. (6)

If “OK” is not active, this would normally be due to your selection of a customer number already being used. Select a different customer number instead.
An alternative way to create a customer is to import data from previous registrations. These may be contained in an export/import file, and may be imported to your particular customer database. See the guide on how to create a customer (via import of standard customer) here.
For more information,
watch the video about how to create space inventory in the online tutorials → here
