- Select the floor in the “Main Data” tree
- Right-click on the drawing and select “Texts” → “Text Layout” and click on “Dørnr., Navn”.
- Rightclick on the text and select “Texts” and click on “Texts Grouped” to ungroup the text pieces
- Click and select the text piece you want to delete and press “Delete” on your keyboard.
- Right-click on the remaining text and select “Texts” and click on “Text size” to change the size of the text.
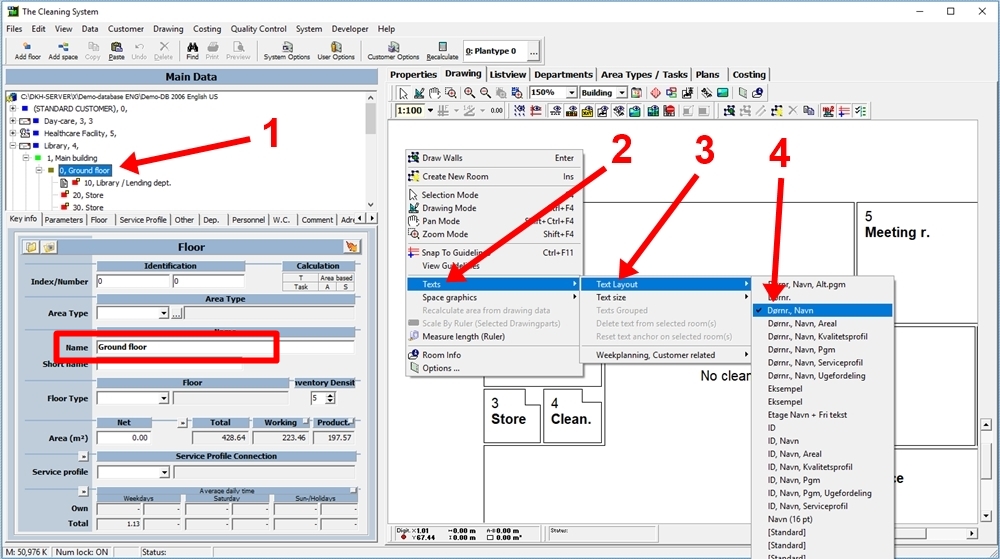
In the “Main Data” tree on the left side of the screen, select the floor you want to add a text. (1)
Right-click on the drawing and select “Texts” (2) → “Text Layout” (3) and click “Dørnr., Navn” (4).
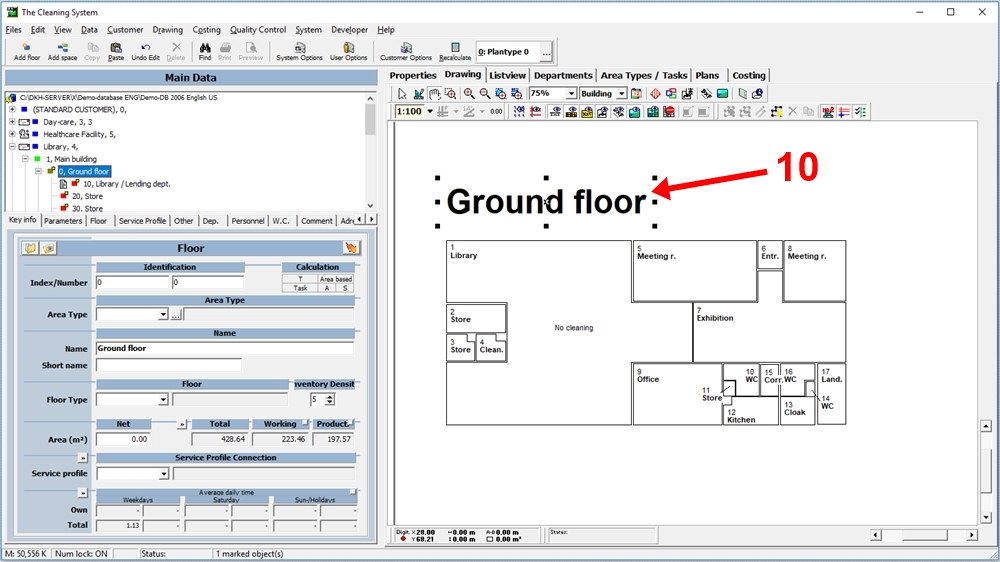
The text in the field “Name” on the left side og the screen, will now be added to the drawing. So will the text in the field “Index/Number”.
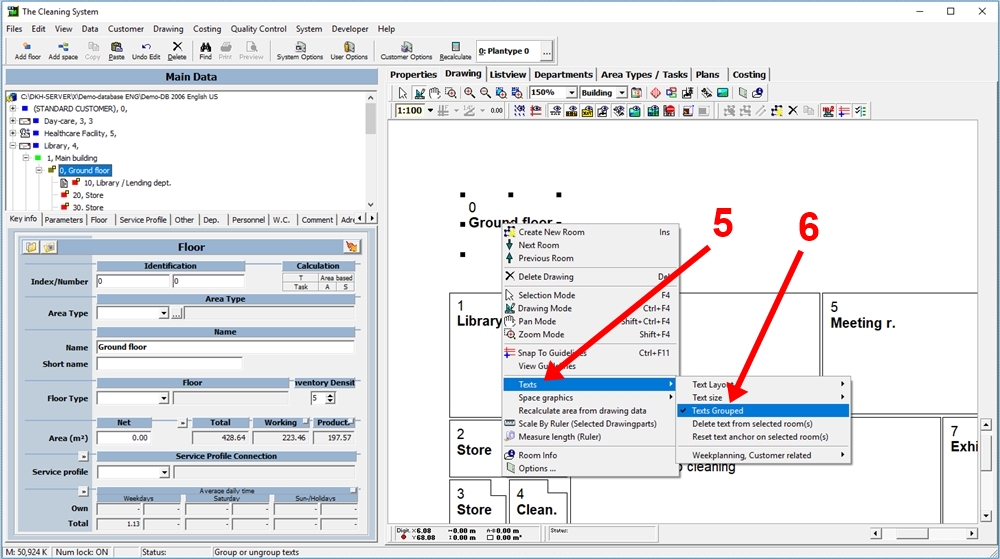
If you want to delete the floor number, right-click on the text and select “Texts” (5) and click on “Grouped Texts” (6) to ungroup the text pieces.
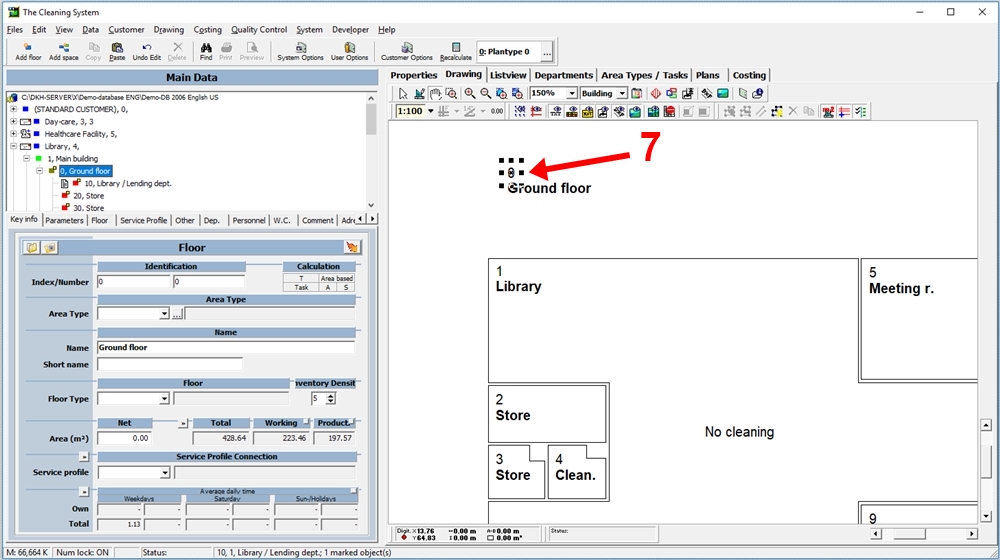
Now, click on the piece of text you want to delete. In the example below, the floor number has been marked. (7)
Click “Delete” on the keyboard to delete the selected piece of text.
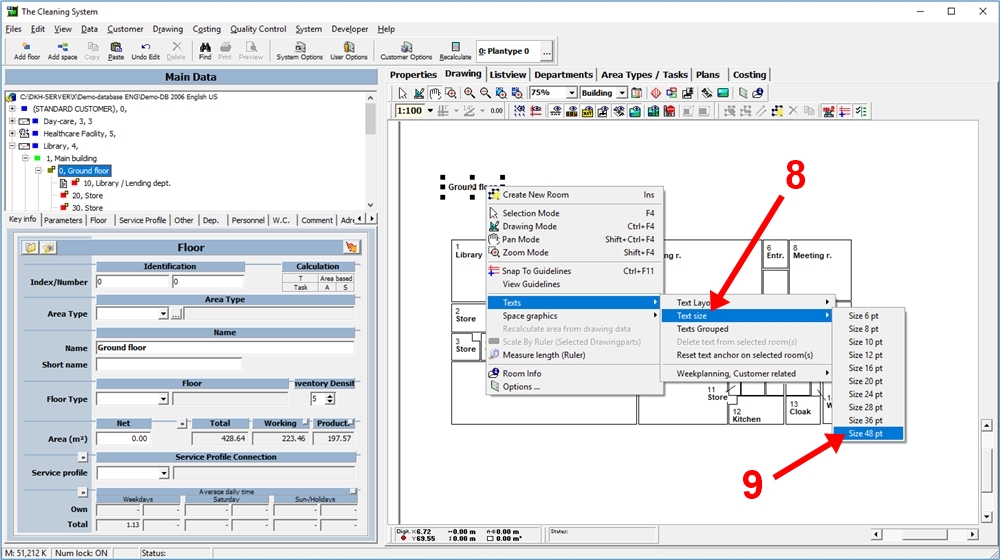
If you want to make the font size of the text bigger, right-click on the text and select “Texts” and click on “Text size”. (8)
Select the size you want for the text. (9)
If you want to move the text to somewhere else on the drawing, mark the text by clicking it. Now, drag the text by holding down the mouse button on the cross in the middle of the text. (10)