- Click “Define and select patterns”
- Select the grid type and click on the brush
- Click on the room you want to assign a grid orcolor code
- Click on the brush again to deactivate the grid or color code mode
Detailed guide
When you have drawn a room/space you can assign a grid or color code to it which makes it easier to get an visual overview of a building and floors. You can also print the grids and color codes using the sections function.
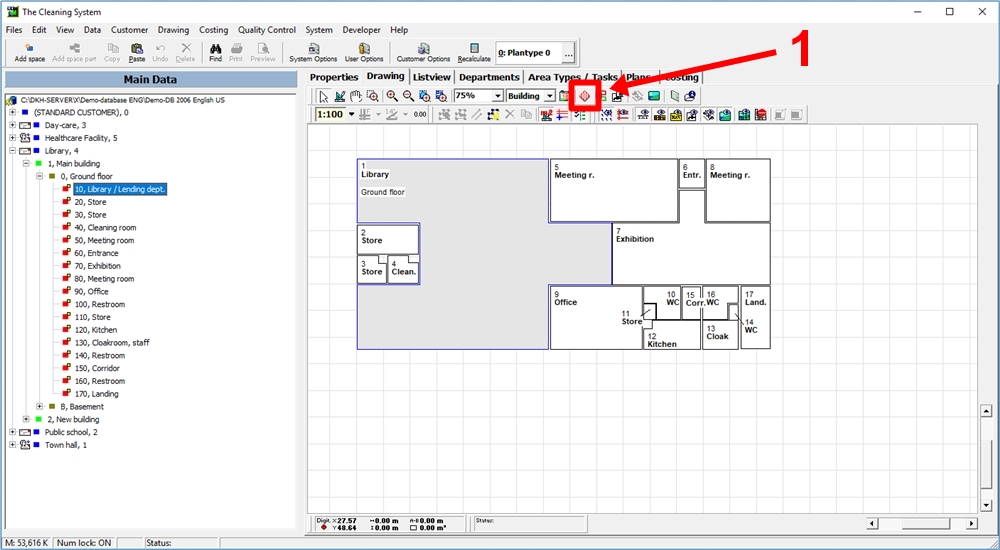
Click “Define and select patterns” in the tool bar. (1)
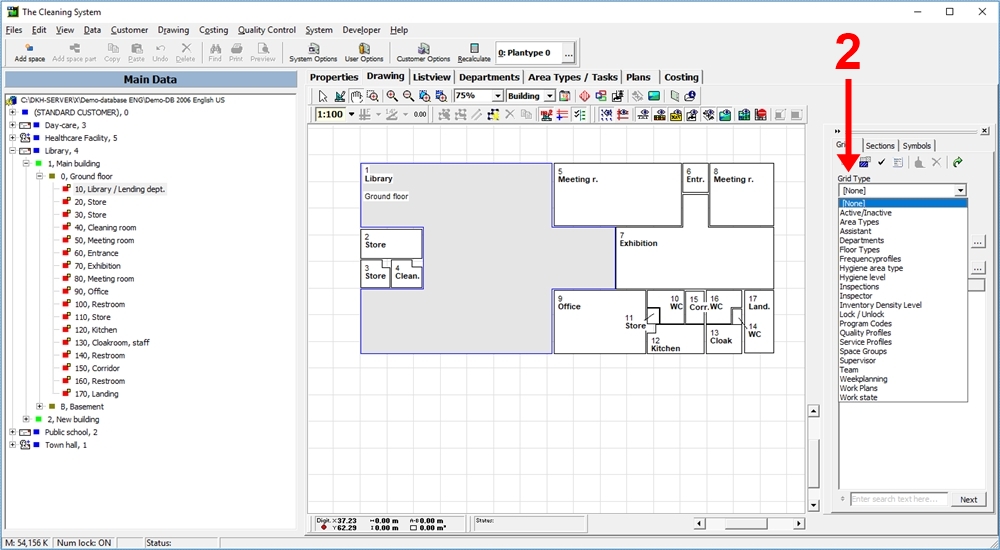
Under the tab “Grid”, select what grid type you want to assign to the room/space on the drawing. (2)
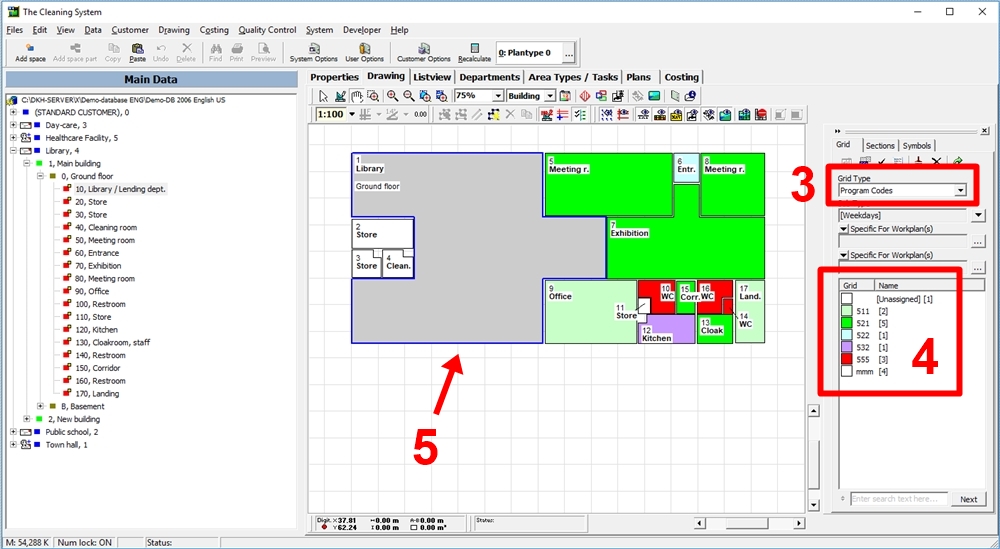
For instance, If you choose the program codes grid (3) the different color codes (4) will be shown on the drawing. The grid/color code will be assigned according to the program codes which have been assigned to the rooms/spaces through the area type. (5)
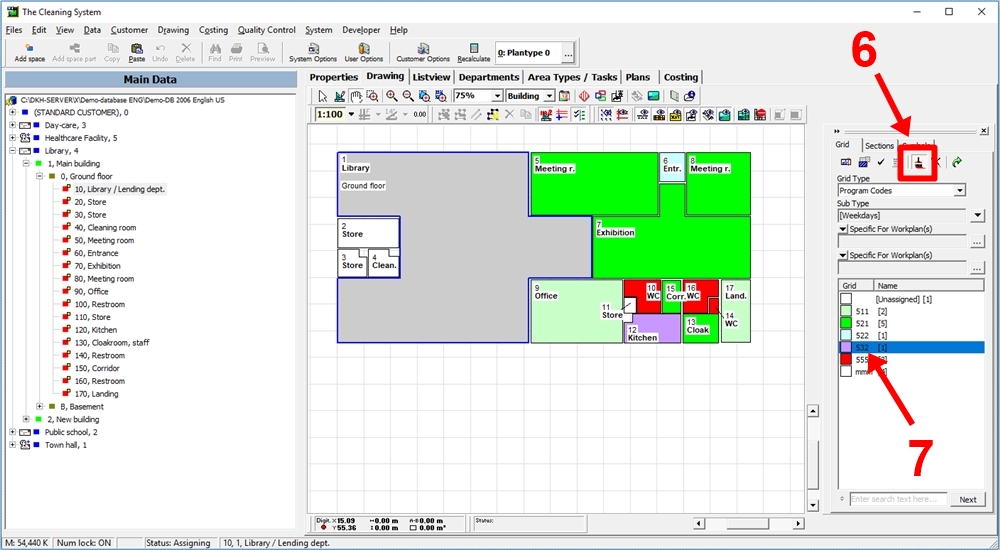
If you want to assign a program code grid to a room/space, click on the button “Assign selected grid to the rooms clicked on by the brush”. (6)
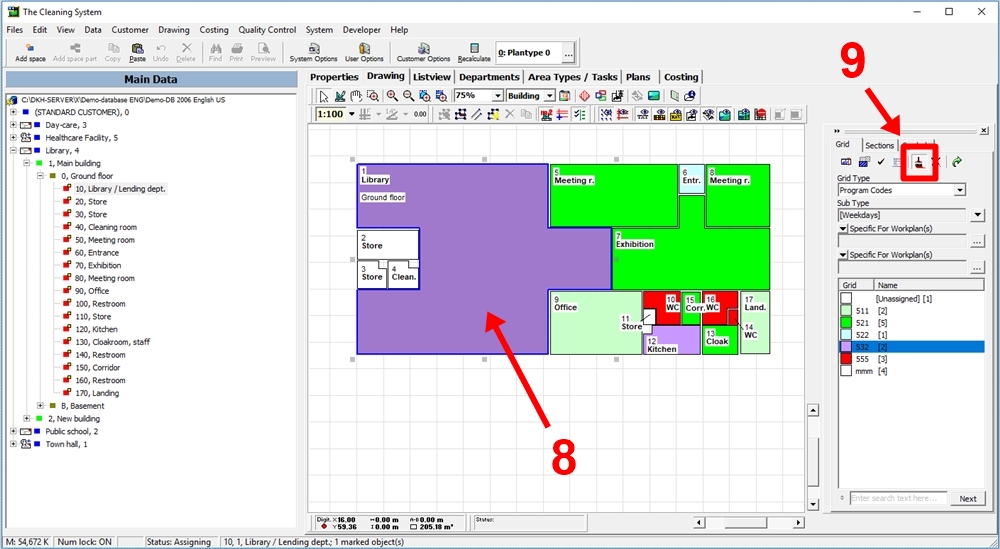
Now, select the program code grid you want to a assign to the room/space from the list. In the example below, we have selected the program code 532 with a purple color code. (7)
The muse cursor is now shown as a brush. Click on the room/space you want to assign the program code grid to. In the example below, we assign the program code 532 (color code purple) to room 1 (library). (8)
Click on the button with the brush one more time to deactivate the grid assignment mode. (9)
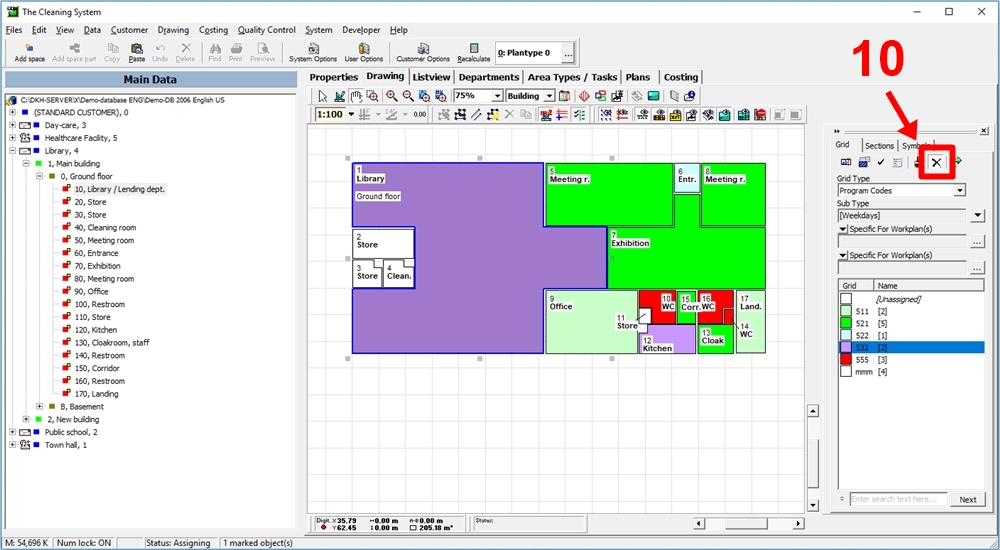
If you want to remove a grid/color code, click on the button with the cross named “Remove grid of the selected type from the rooms clicked on by the brush”. (10)
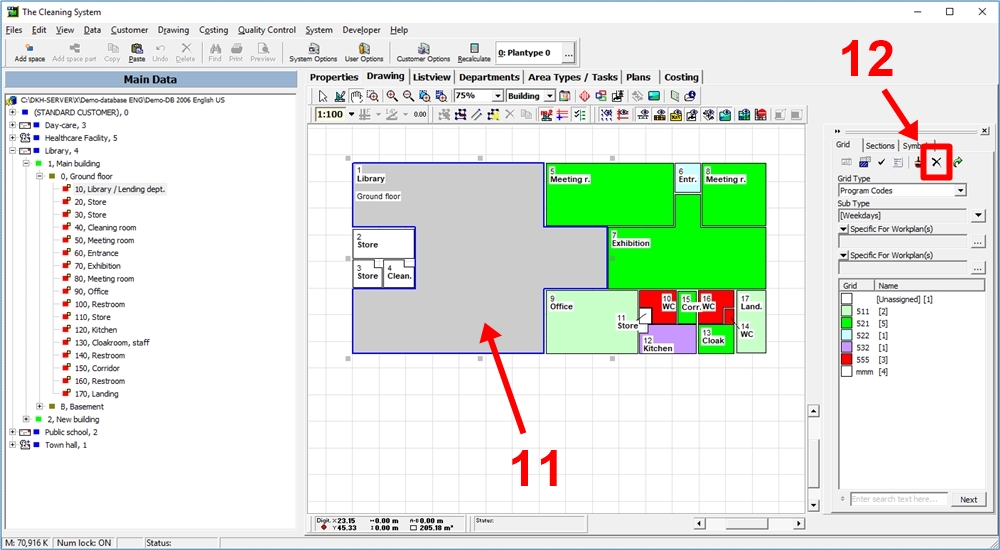
The mouse cursor will now be shown as a brush with a minus sign next to it. Click on the room/space you want to remove the grid/color code from. (11)
When you are finished removing the grid/color code, click on the button with the cross again to deactivate the remove mode. (12)
For more information, watch the video about color coding in the online tutorials → here