- Mark the room, you want the zone to be decucted from.
- Click “Subtract area” in the tool bar and draw the area you want to subtract.
Detailed guide
When you draw a room it is sometimes necessary to subtract an area, for instanse, when you draw a staircase with a gap in the middle, or when you draw a hall with big pillars that takes up a big part of the area of a room. You can also use the subtraction function when you need to make space for a room which is located in the middle of an already drawn room. That could be rooms like toilets, connecting hallways, etc.
You draw these “minus areas” the same way as a “plus area” just as you usually draw rooms.
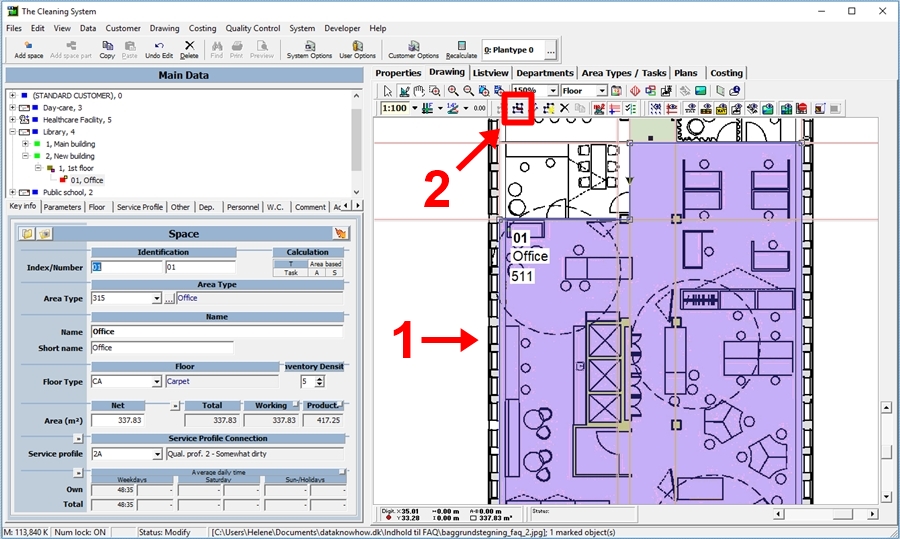
Select the room you want to subtract an area from. (1)
Click the “Subtract area” button in the tool bar. (2)
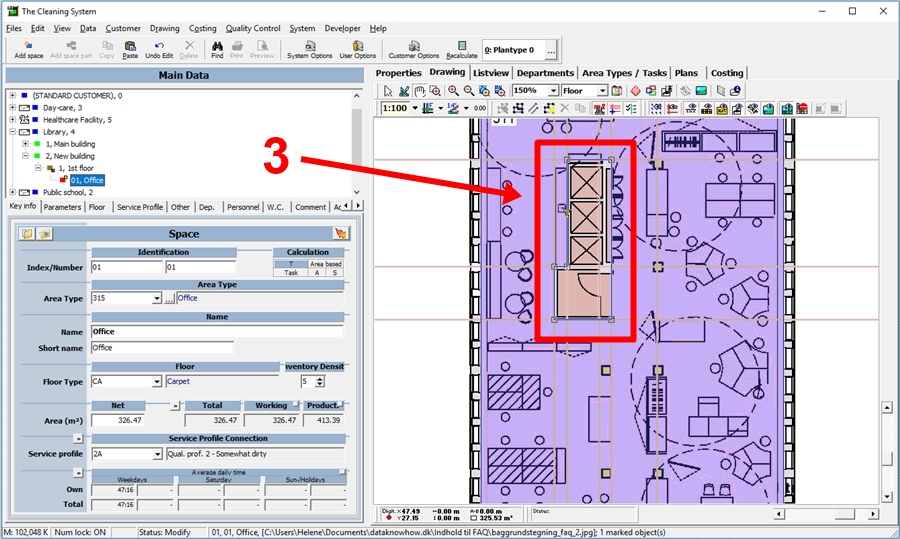
Draw the area on the building plan which you want to subtract. In this example, it is cabinets and a small storage room that we want to subtract from the big office area. (3)
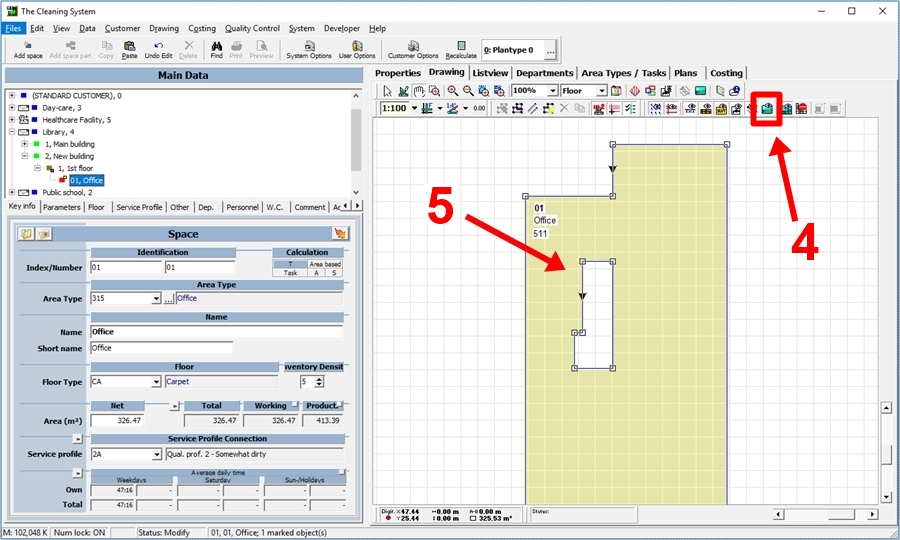
If you click in the button “display graphic file(s) on/off” (4) to turn it off, you can easily see that the area you just marked is cut out of the room. (5)
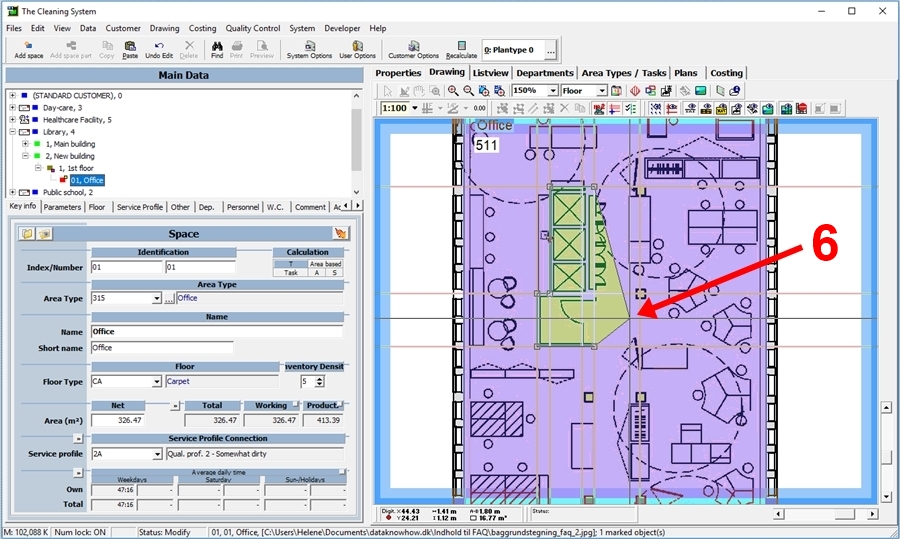
If you want to change the subtracted area, you can just pull the corners or sides of the area, exactly as the outer sides of the draw room. (6)