- Create a new customer database and open it.
- Import the area type set to the new customer database.
- Add a new customer to the new customer database.
- Attach the area type set and choose calendar and period definition.
Detailed guide
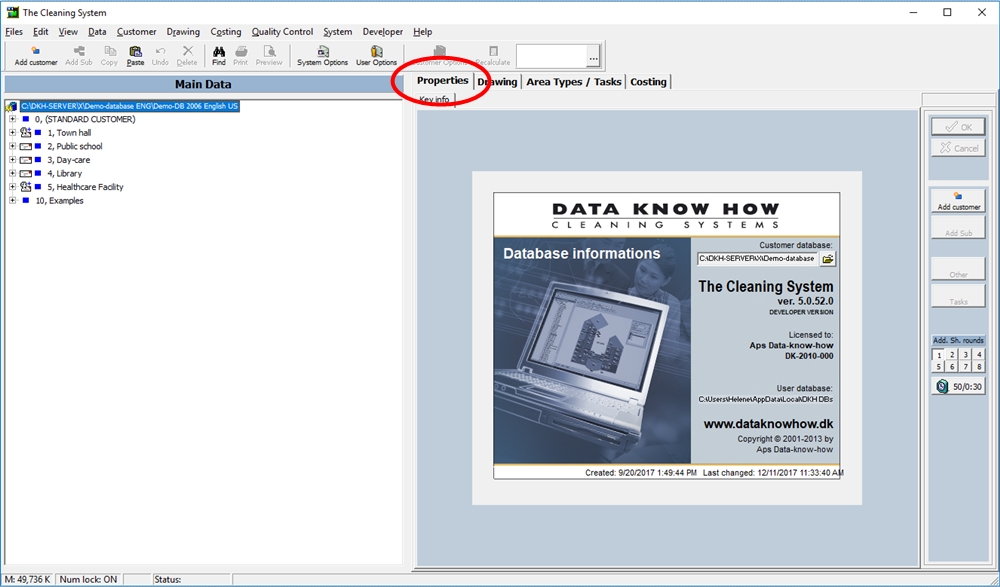
Go to the tab “Properties”.
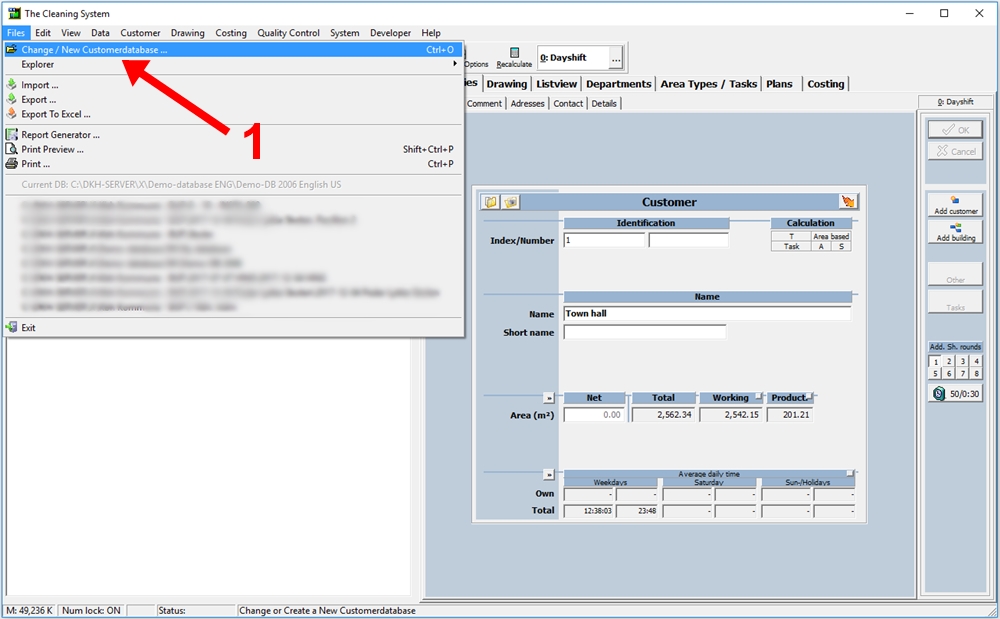
Click “Files” – “Change/New Custumerdatabase” in the menu bar to create a new customer database. (1)
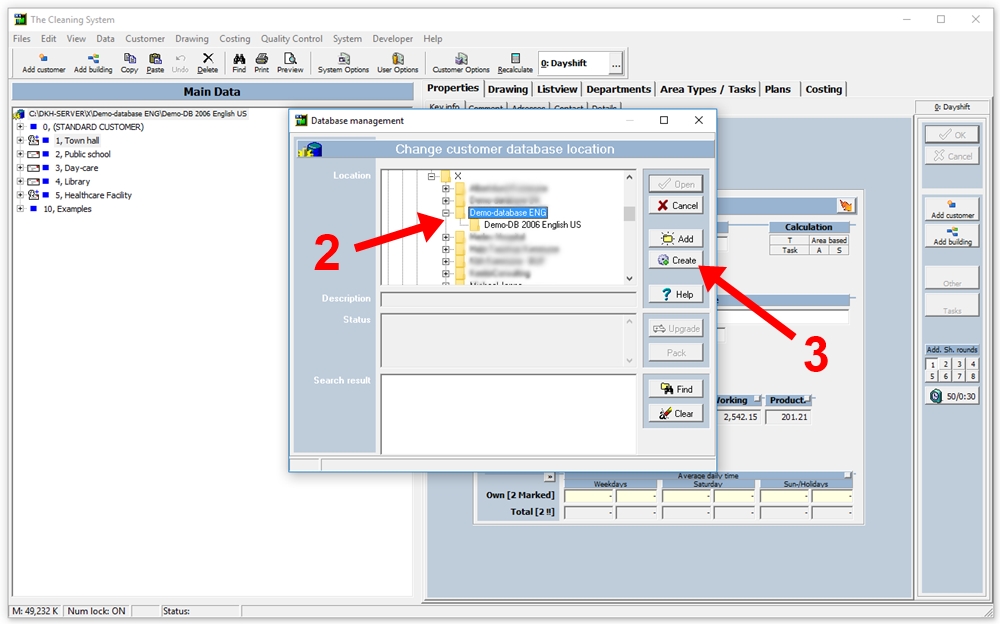
Choose where you want to create the new costumer database (2) and click “Create”. (3)
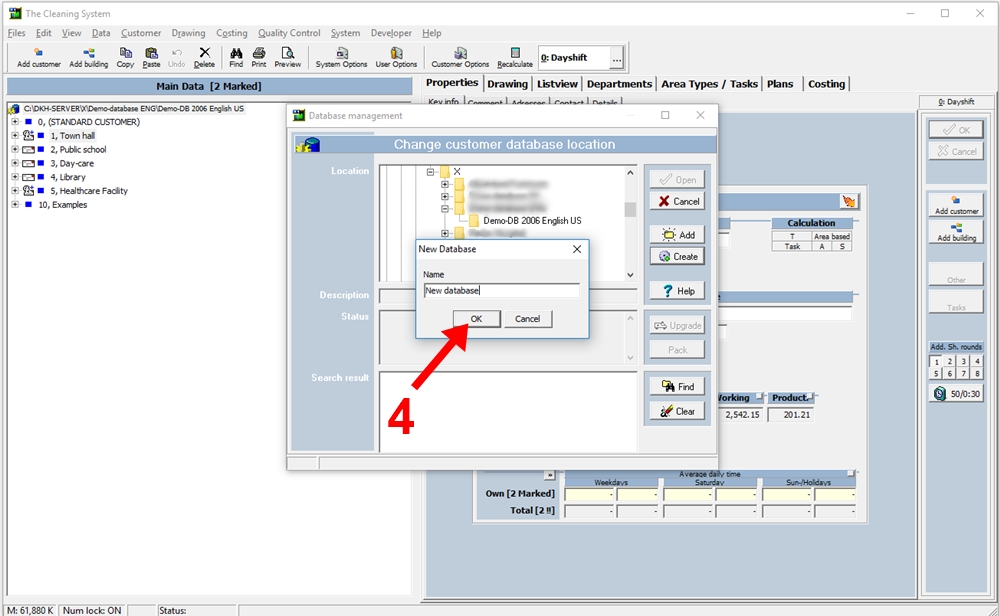
Name the new database and click “OK”. (4)
Click “Open”. (5)
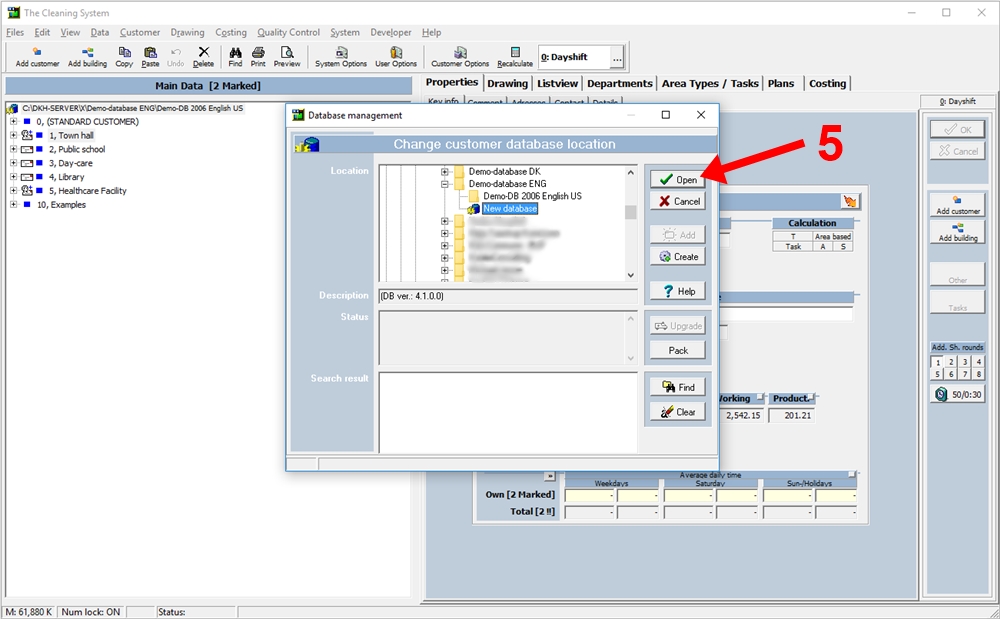
Click “Files” – “Import” in the menu bar to import an area type set to the customer database. (6)
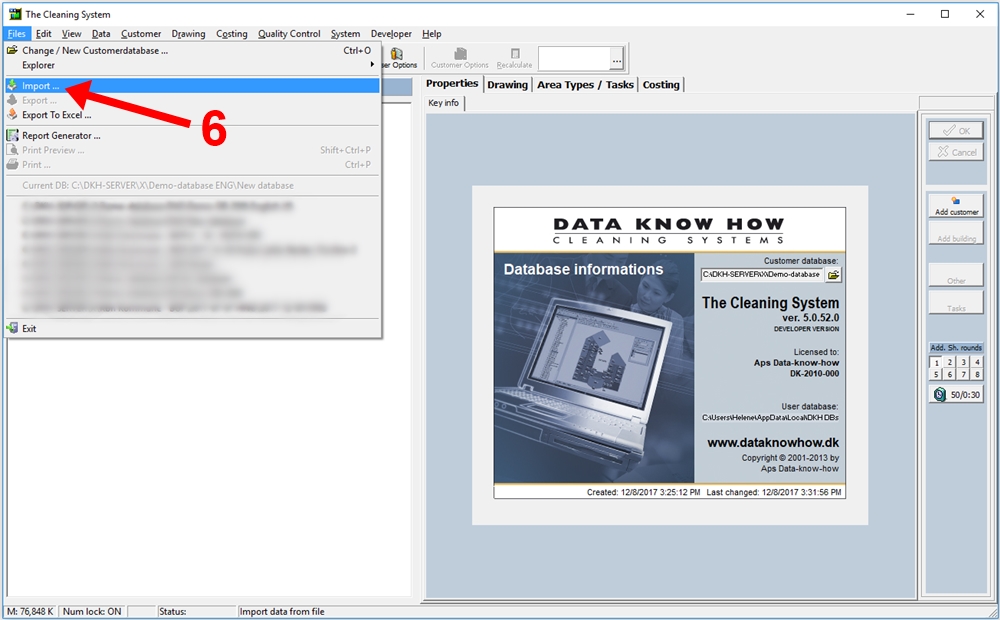
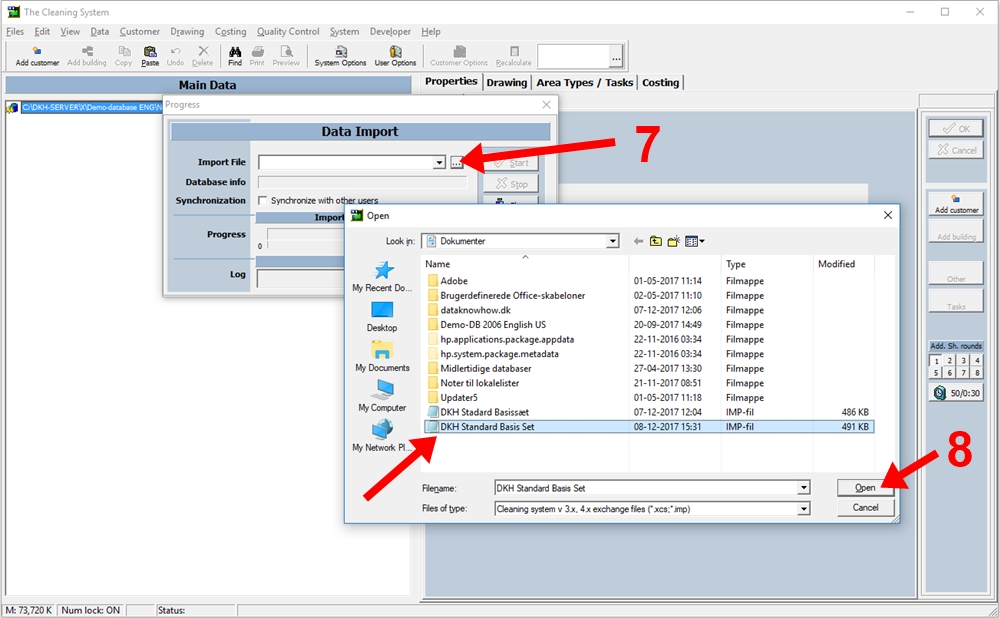
Click the “…” button next to “Import File” in the “Progess” window (7) og find the area type set you want to import to the customer database and click “Open”. (8)
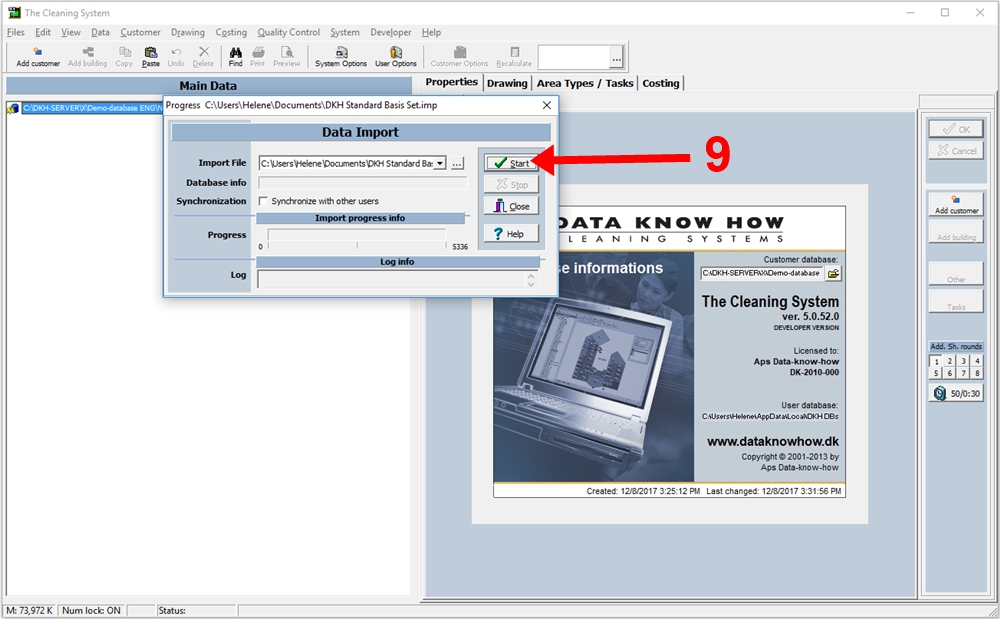
Click on “Start” to import the area type set. (9)
When it is done, click “Close”.
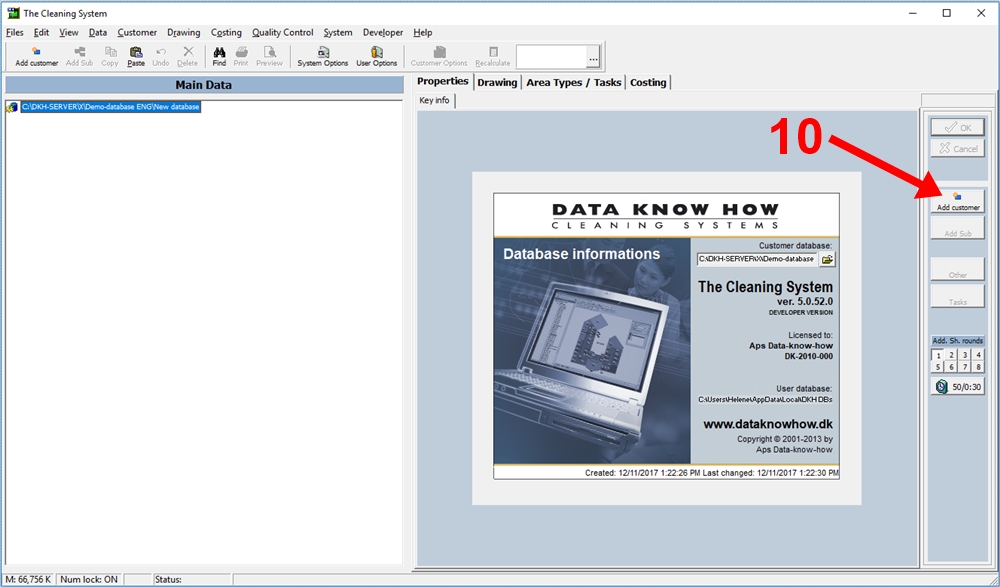
Add a new customer by clicking the “Add customer” button (10) on the right side of the screen.
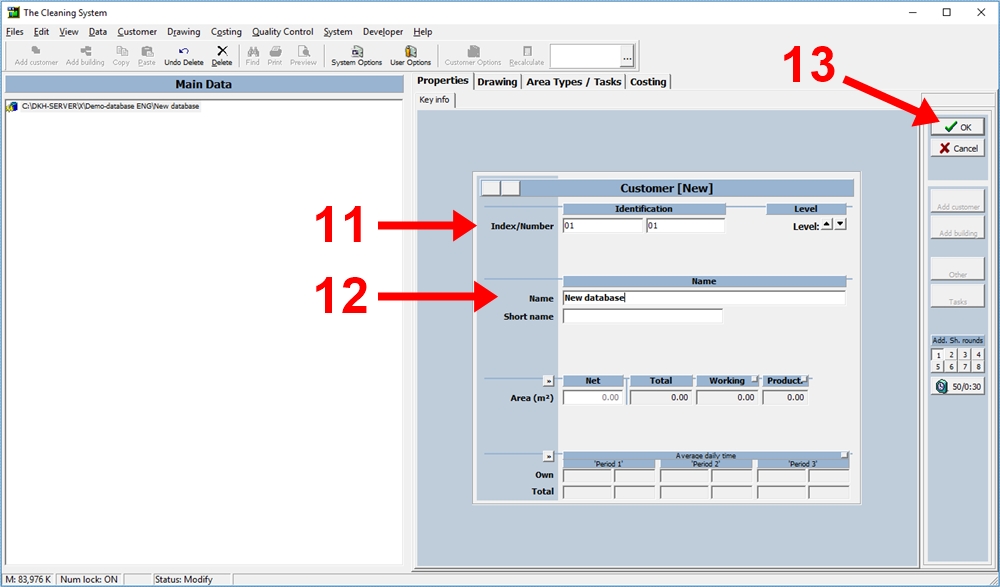
Enter the “ID/Nummer” (11) og “Name” (12) for the new customer. Click “OK” (13) to complete adding the customer.
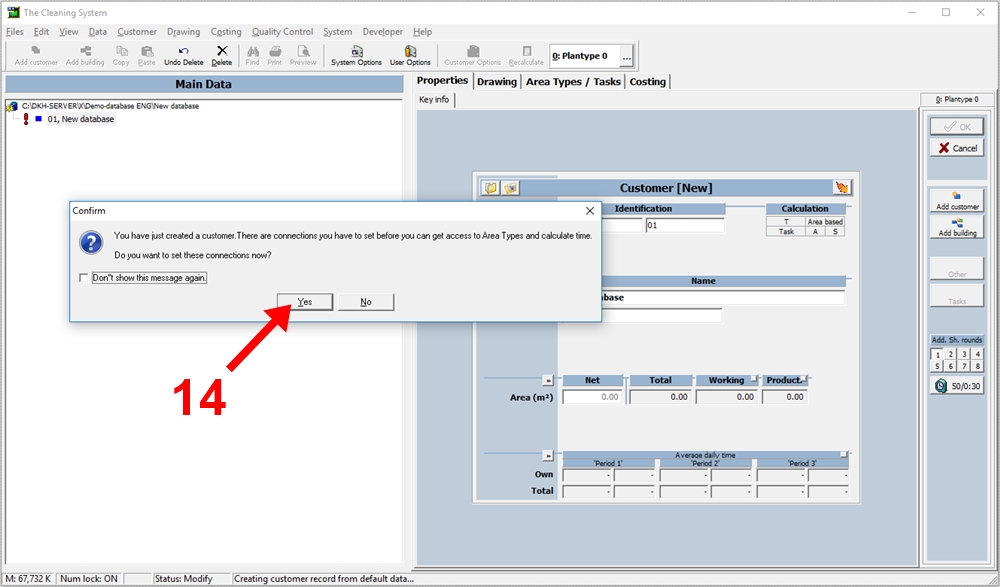
confirm the you want to apply a area type set to the new customer database by clicking “Yes”. (14)
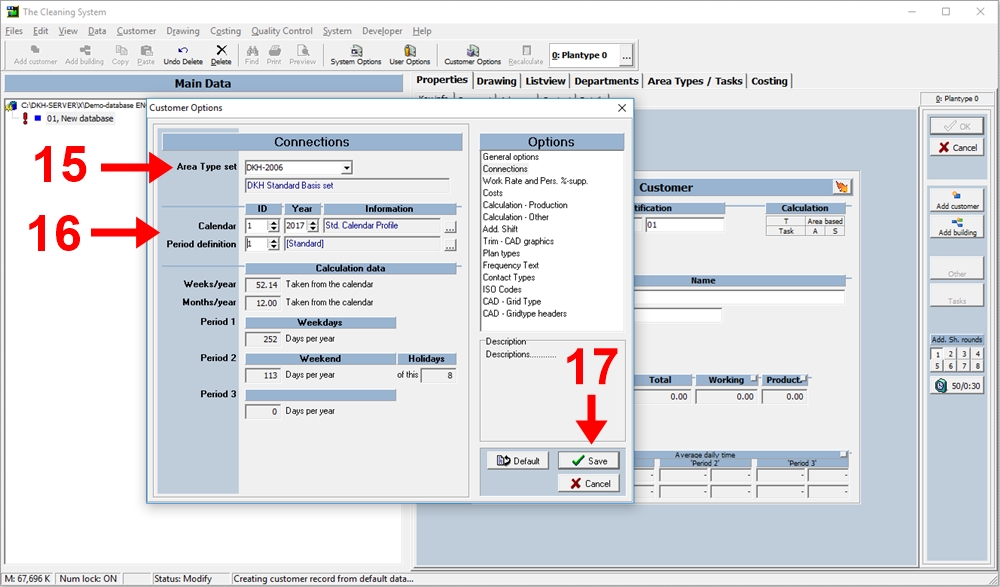
Choose the area type set you just imported under “Area Type set” (15), define “Calendar” and “Period definition” and click on “Save”. (17)
You have now created a new customer database, added a new customer and attached an area type set to the customer.
