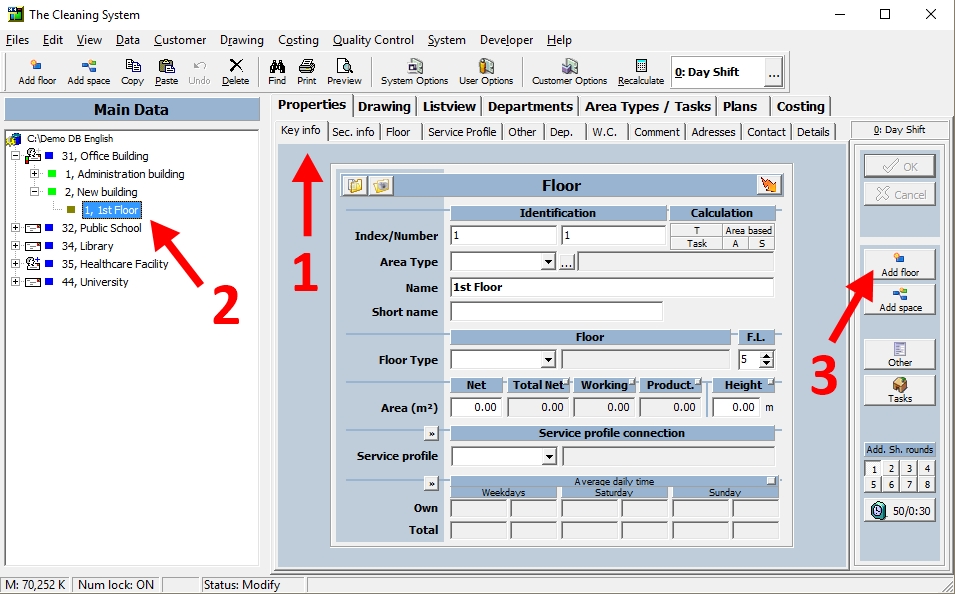
- Select the “Properties” tab and the “Key info” tab.
- Mark the customer to which the building is to be attached.
- Click “Add Space”.
- Enter the number of the new floor in the identification field “Index”.
- Select the “Area Type” that meets the room requirements.
- If required, change the name, short name, floor type, and service profile in the associated fields.
- Click “OK”.
Detailed guide
Select the tab “Properties” and the tab “Key info”. (1)
In the “Main Data” tree, mark/select the floor to which the room is to be attached. (2)
Click “Add Space”. (3)
Enter the number of the new room in the “Index” field. (4)
Select the area type that meets the room requirements in the “Area Type” field. (5)
The remaining fields will automatically be completed, including room name and abbreviation.
If required, change the name of the room in the “Name” field. (6)
If required, change the abbreviation for the room in the “Short name” field. (7)
If required, change the room floor type in the “Floor Type” field. (8)
If required, change the service profile in the “Service profile” field. (9)
Click “OK”. (10)
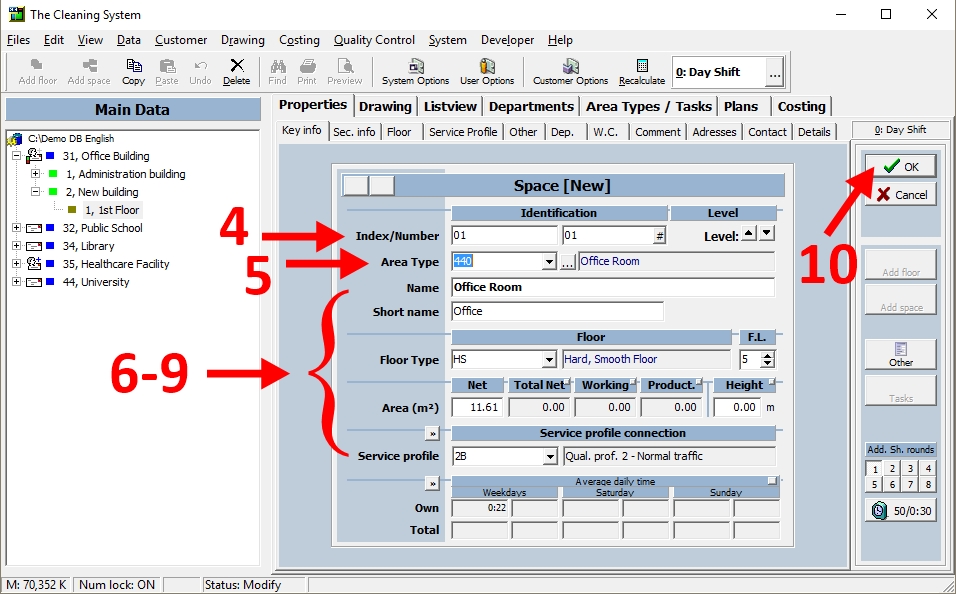
If “OK” is not active, this would normally be due to the fact that you have selected a room number which has already been created under the particular floor. If so, you must use a different room number.
For more information,
watch the video about how to create space inventory in the online tutorials → here