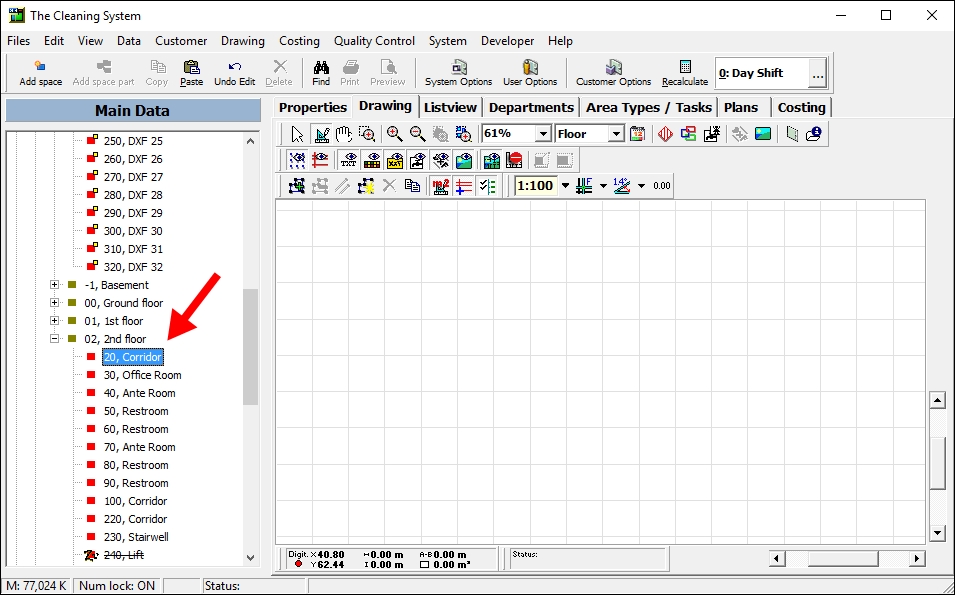
- Mark/select the floor you want to copy the room polygons to.
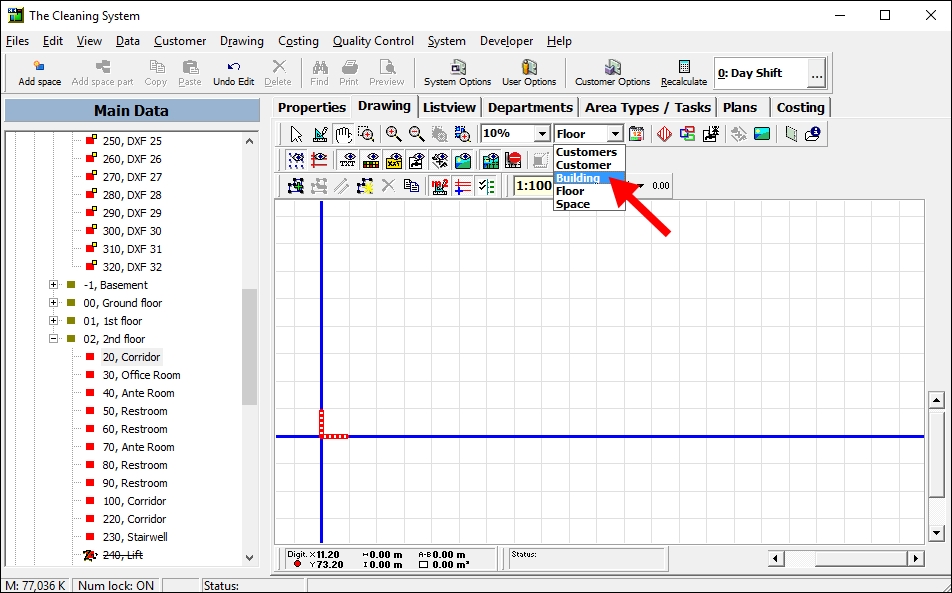
- Make sure that the drawing shows both floor plans in the selected building by clicking “building” in the dropdown box.
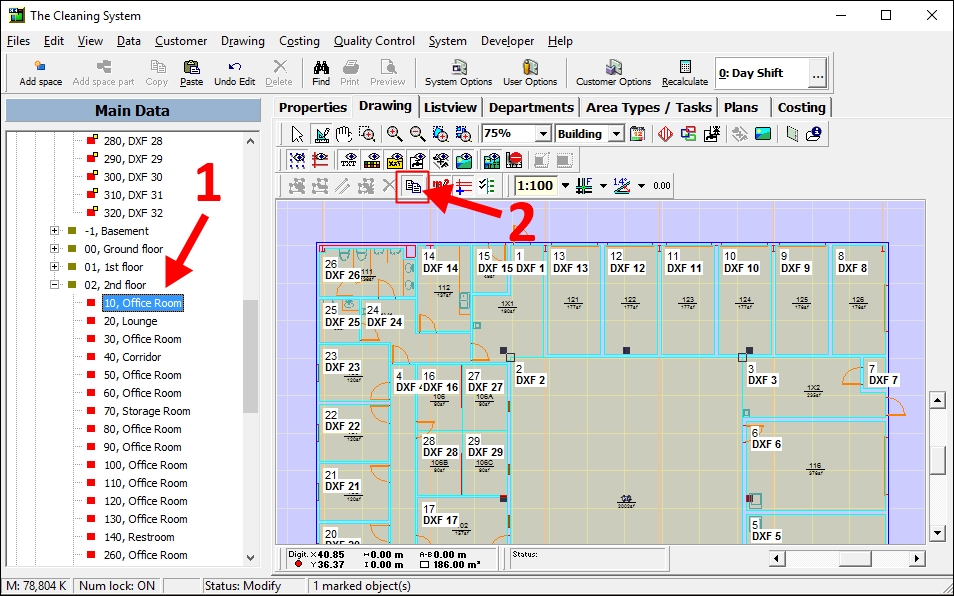
- Select the space on the original floor which you want to copy the room polygons to and click on the “Copy” button in the toolbar.
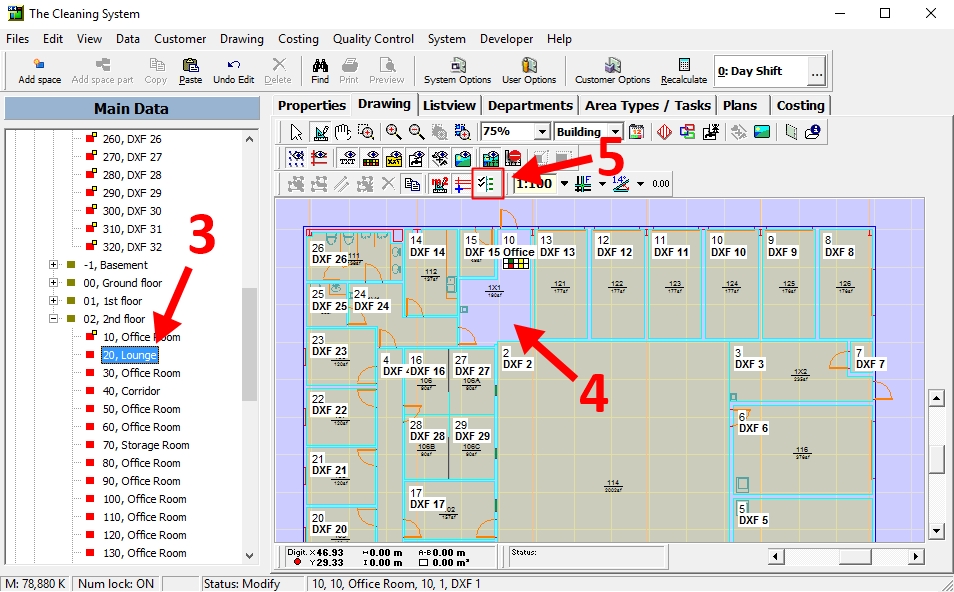
- Click on the space in the drawing, you want to copy to the original floor.
- Press “ESC” to exit copy mode.
Detailed guide
Go to the Main Data tree on the left side of the screen. Open the floor you want to copy the room polygons to. It is important that both the temporary floor and the original floor are open.

Make sure that the drawing shows both floor plans in the selected building by clicking “building” in the dropdown box.

Select the space on the original floor which you want to copy the room polygons to. (1)
Click on the “Copy” button in the toolbar. (2)
The Drawing space will change color and you can now click on the room polygons on the drawing, you want to copy to your original floor.

When you assign a room to a space on the original floor, a small yellow square will appear on the space name in the Main Data. The marker will automatically jump to the next space without a room polygon (3) and you can now assign another room polygon to this space.
The space you have assigned change color on the drawing. (4)
Notice: If the maker does not jump to the next space, activate the button “Automatically select new room after drawing” in the toolbar. (5)

If you want to exit the copy mode, press “ESC” or right-click and choose “Close”.
For the whole guide on how to import a DXF file and copy room polygons → Click here
